
PINHOLE PHOTOGRAPHY
I have recently started experimenting with pinhole photography by using containers like Coca-Cola cans, recyclable coffee cups and other items usually disposed of. These objects, combined with photographic paper, have generated the results below. Much more will be uploaded over time.

2025-03: Pinhole camera photograph/solargraph of a forest and lake with the sun moving across the sky. Two-week exposure of Coca-cola can and Ilford photographic paper.
2025-03: Pinhole camera photograph of a scrubland with the sun moving across the sky. Two-week exposure of Coca-cola can and Ilford photographic paper.

2025-03: Pinhole camera photograph of a forested lake with the sun moving across the sky. The exposure length is visible in the sun streak. Every day of exposure the sun moved a little higher. Coca-cola can and Ilford photographic paper.

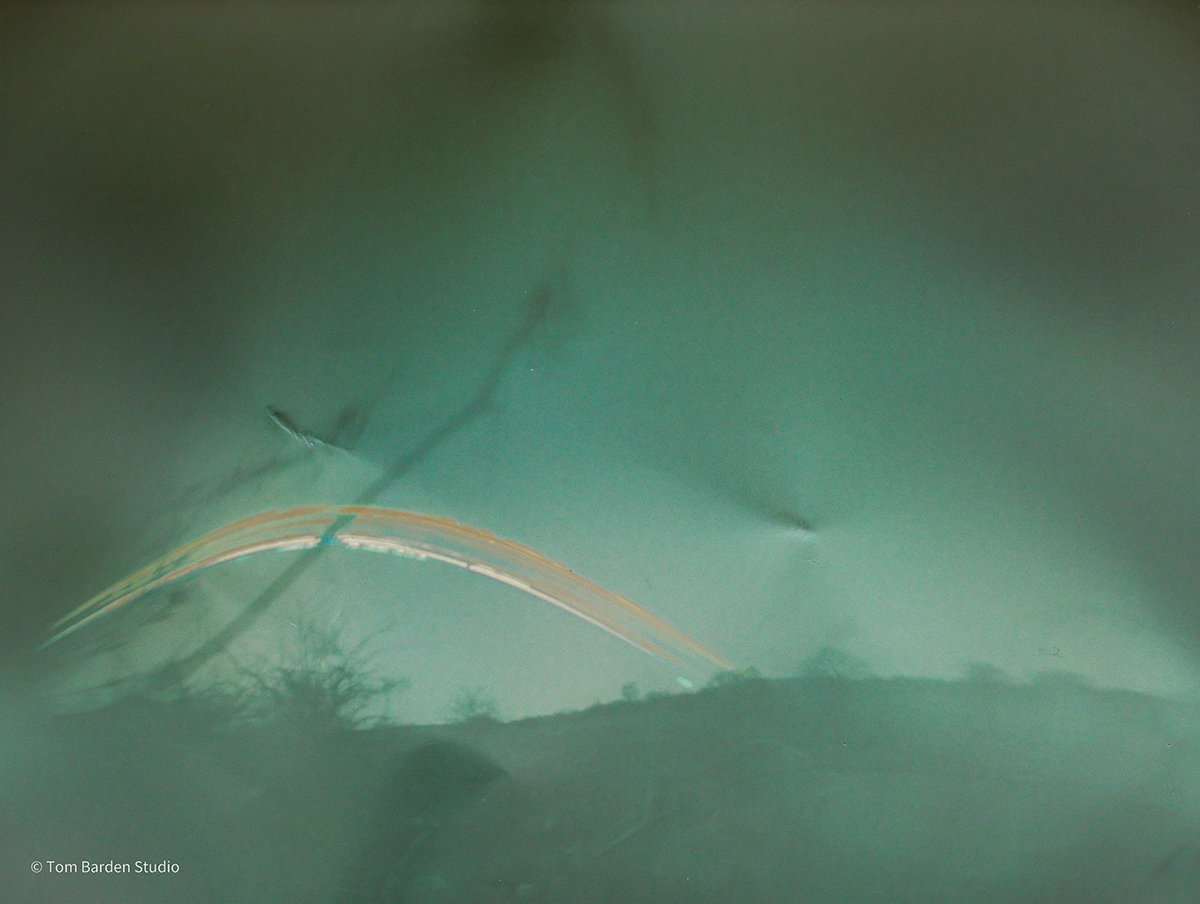
2025-02: Pinhole camera photograph of a tree canopy looking from the ground up. Exposure over six days. Coca-cola can and Ilford photographic paper.

2025-02: The first pinhole photograph I have taken. My rear garden. This was captured using a Coca-Cola can with some Ilford Photographic Paper over a 5-hour exposure during a sunny February day.
THE COCA-COLA CAN
PINHOLE CAMERA
To create my pinhole camera I used an old Coca-Cola can. I cut the top off the can (just below the rim) and found an opaque object to cover it. You could use the top of another can and slide it over (just tape it in place once the paper is inside). This creates the ‘camera’ body and keeps it dark inside.
I then used a needle to pierce a small hole about 3/4 of the way up the can - this is where the light will enter the camera, and is the point that should be facing the subject to be photographed. Make sure to cover the hole with some opaque tape (duct tape works well) until you have placed the camera. Experiment with different sized holes and hole locations for different exposure results.
It’s now time to insert the photographic paper into the can, making sure it doesn’t cover the pinhole. Ensure this is done in low light so you don’t start exposing the paper before it’s time. Once the paper is inside you can seal the top of the can with the cap you are using, I also used duct tape to ensure no light would enter. The paper I used to begin with was an Ilford brand, but there are many out there and all have different effects.
Once you have your camera set up, take it to the location you want to photograph, place it down and remove the duct tape covering the hole. I recommend doing it in the back garden, or maybe from the window of your home for a first go.
Depending on the objects used, the size of the hole and many other factors you can leave your camera for a few hours to weeks, months and, in some cases, years. The first time I tried I left it for about 5 hours in sunny conditions, you can see the result above.
When you take the paper out of the camera it will be a negative, upside down and flipped. You will need to tape it to a flat surface, take a photo on your phone and use an app to turn the negative into a standard photograph. Then you can use your phone to flip it in the correct direction.
Make sure to store your negative in a dark place with no light, otherwise it will continue to expose. Later, if you dive into the world of chemicals, you may be able to develop and set the image. I suggest putting it back into the dark pouch the photographic paper came in.